Terrazzo
is when you mix a small material such as rock fragments, shells, glass shards or resin with white acrylic powder. The way to do it is very easy and simple. Let’s have a look at the equipment!
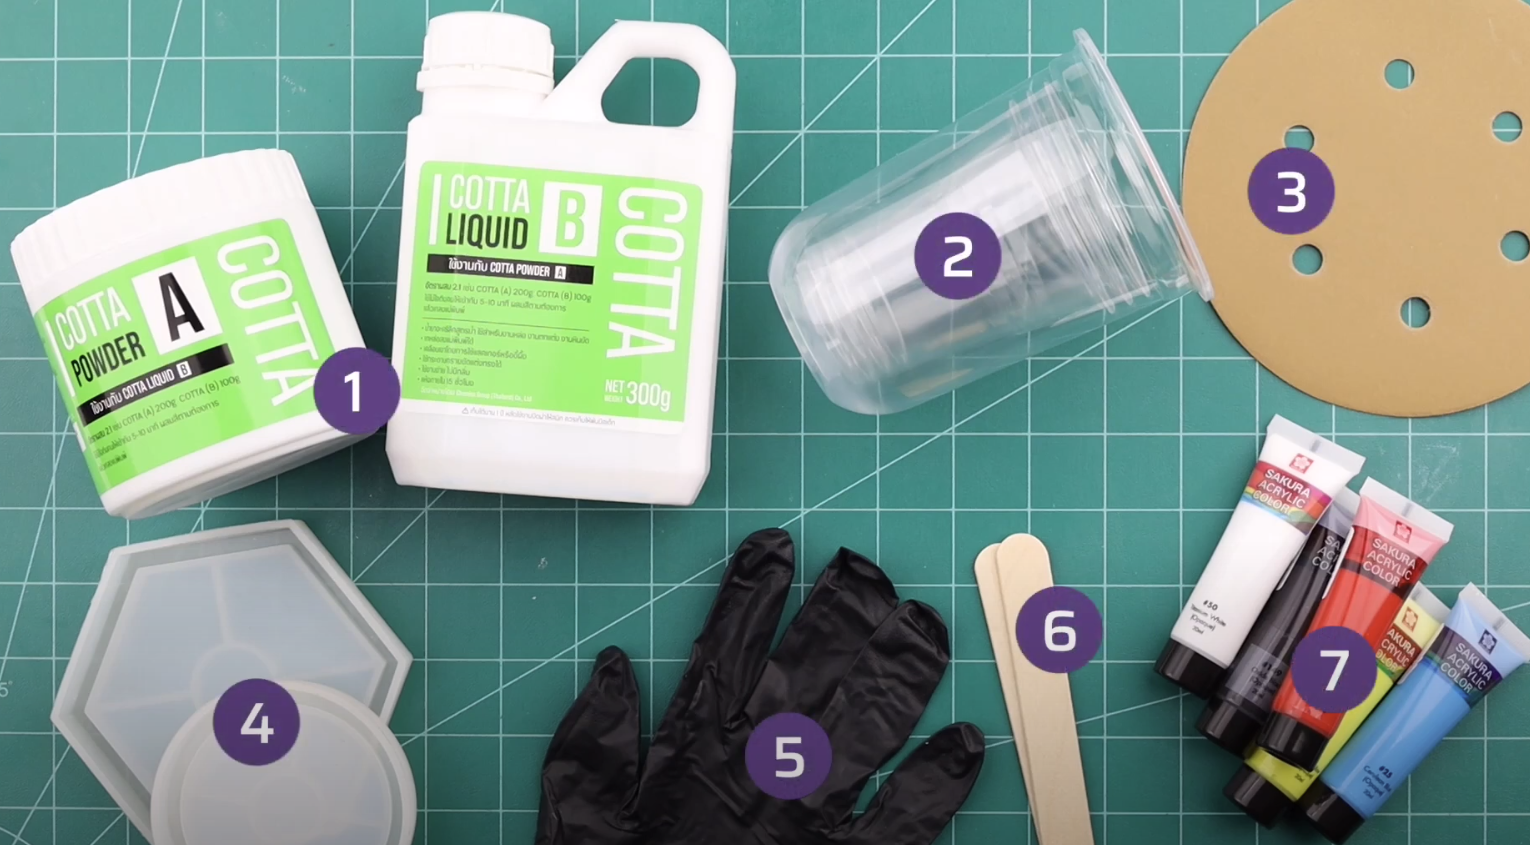
Equipment for Terrazzo
- COTTA (from EASY RESIN)
- Plastic glasses or container for mixing ingredients.
- Sandpaper
- Silicone molds
- Gloves
- Popsicle sticks
- Acrylic paints
DIY Terrazzo is very simple! Let’s get started.
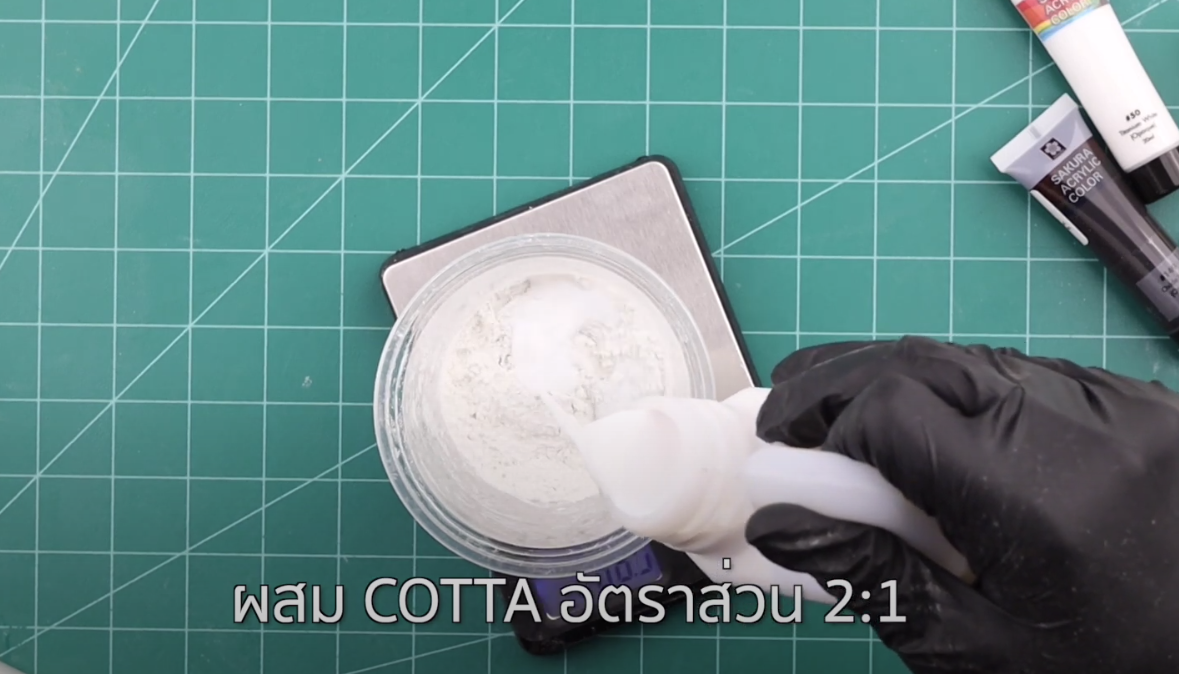
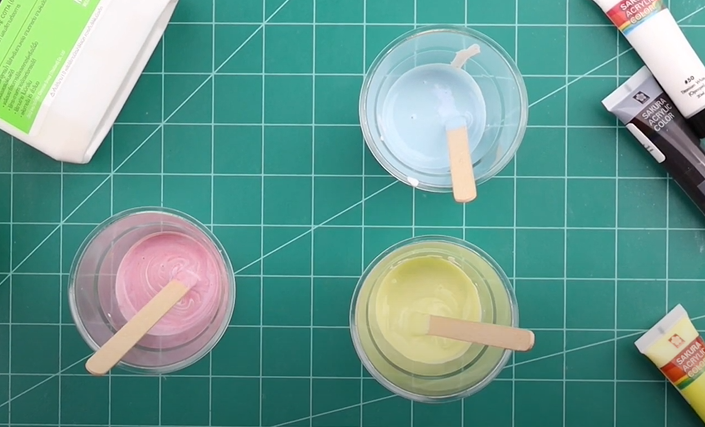
1. Start by mixing COTTA at a ratio of 2 : 1.
By using COTTA Part A of 100 grams and Part B of 50 grams, pour them into the prepared plastic glass or container, then stir for 5 – 10 minutes. Once the ingredients are well combined, divide them into the desired number of colors, add the prepared acrylic paints, and stir until the ingredients are well combined again.
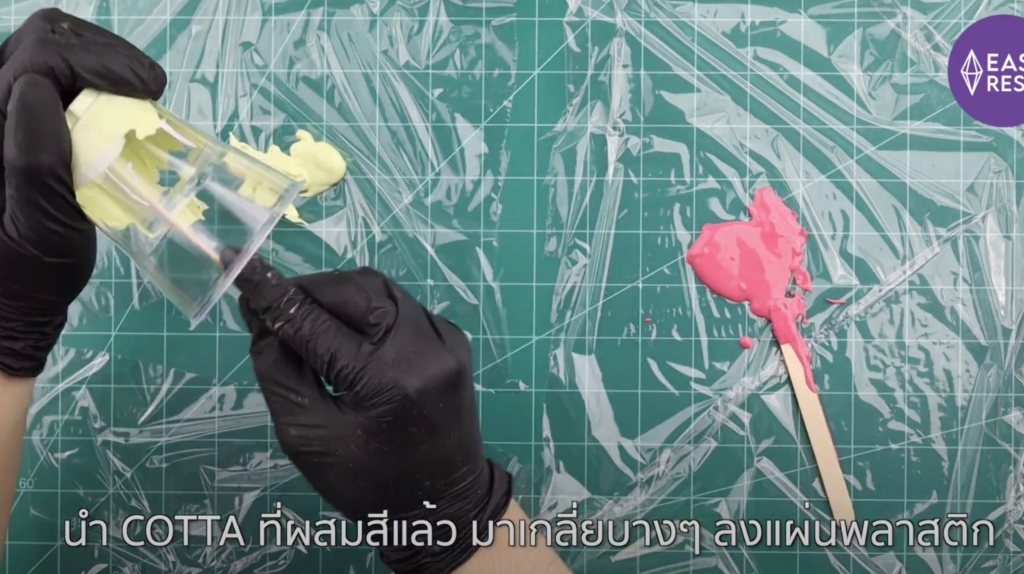
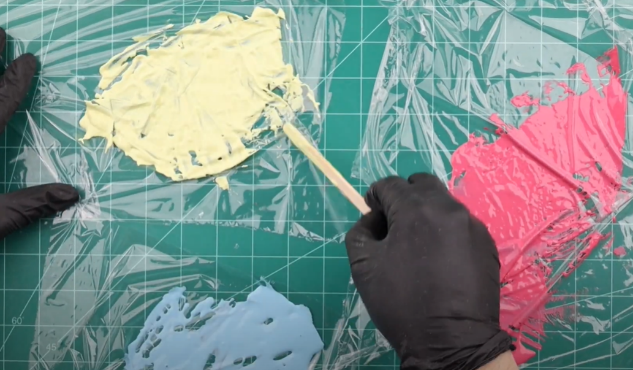
2. Pour it on the plastic wrap.
And then spread, fold, and press the plastic until it is 1 – 2 millimeters thin, then let it dry for about 12 hours.
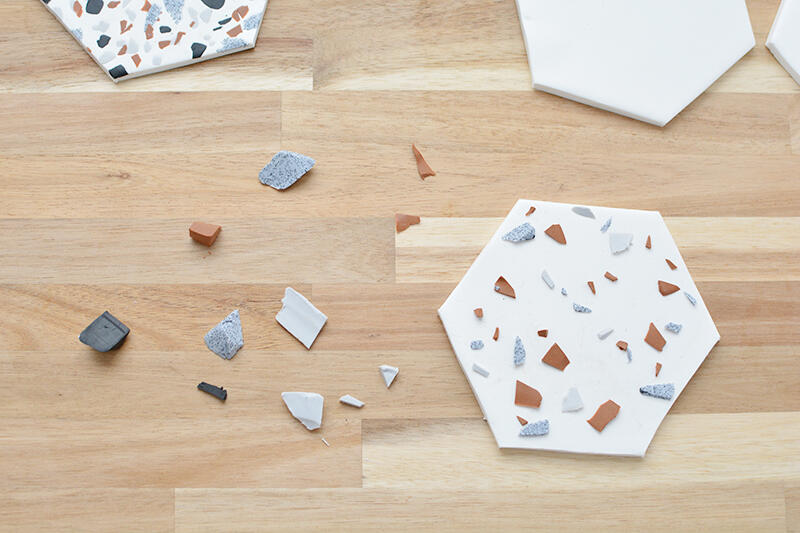
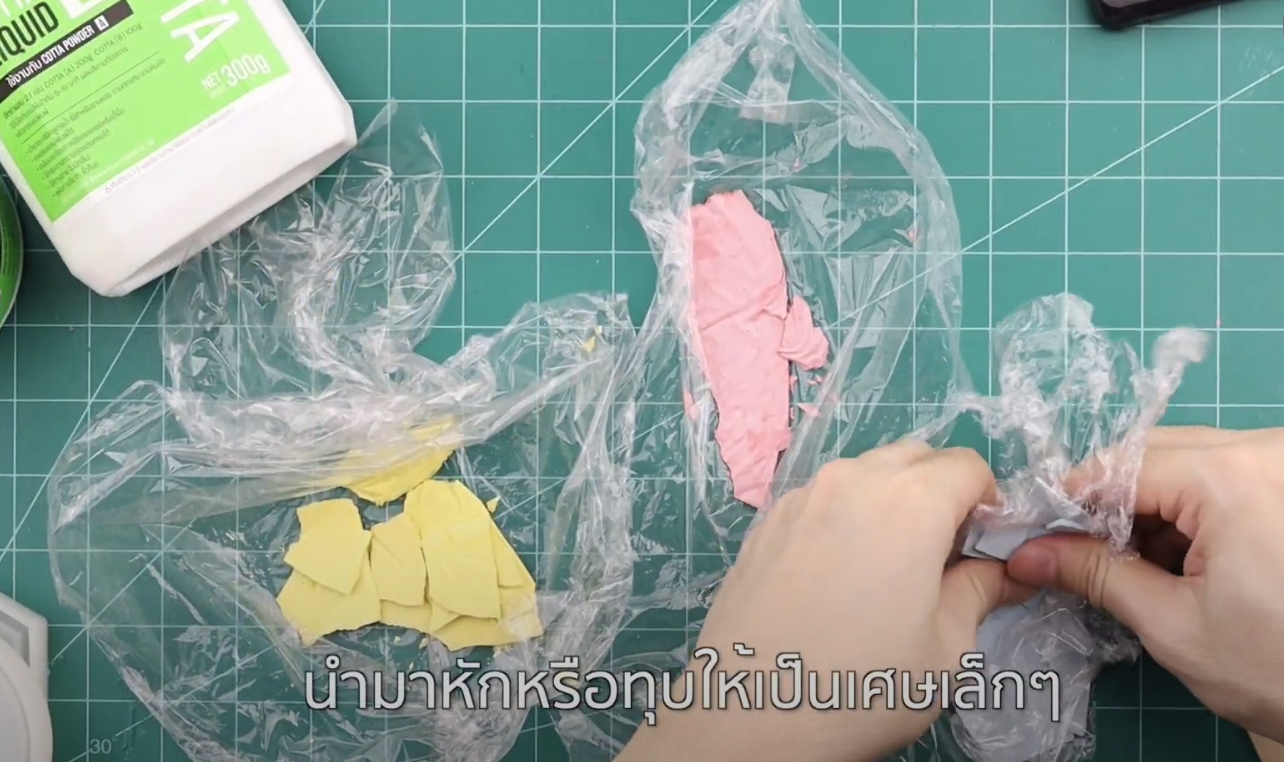
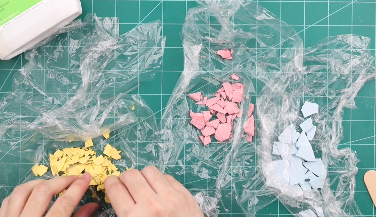
3. Break or crush with something solid.
To get a small rock crystals from the COTTA.
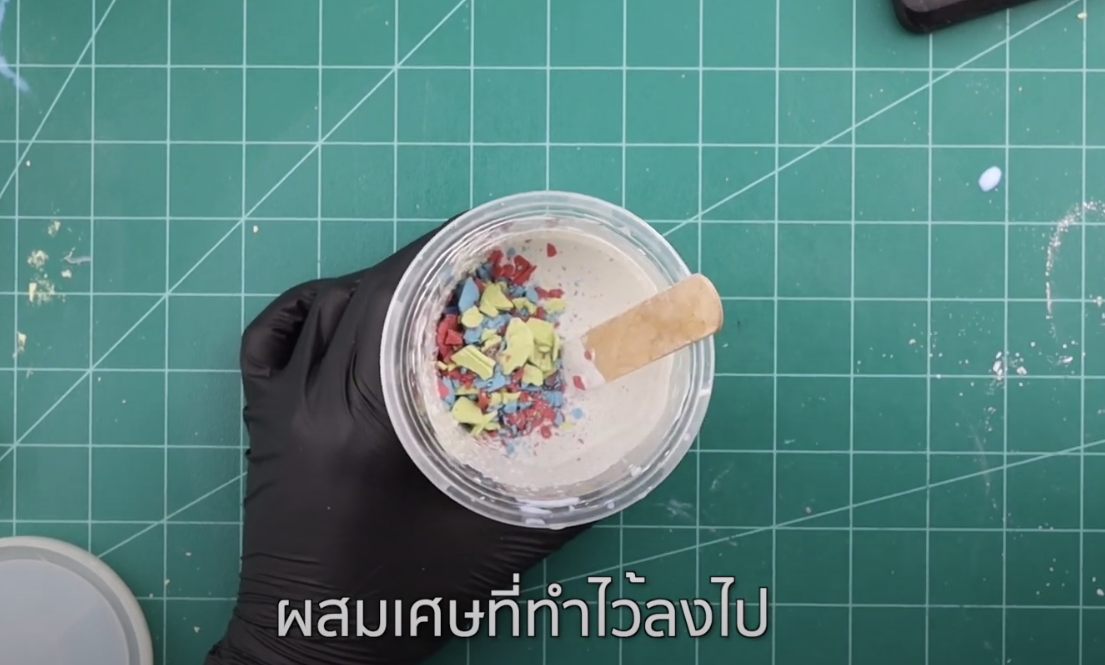
4. Mix the COTTA at a ratio of 2 : 1 as before.
Pour the ingredients into the prepared container and stir for 5 – 10 minutes. After that, we can now add the rock crystals that we made.
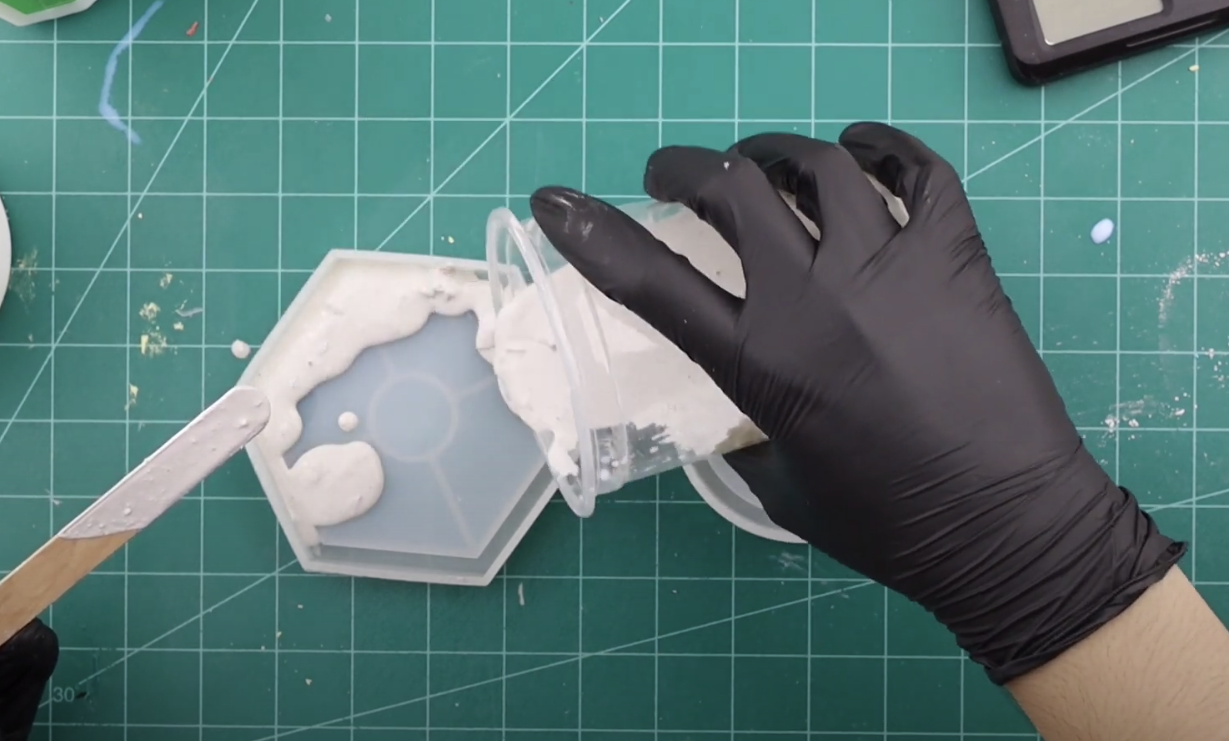
5. Pour into the prepared silicone mold.
Then use a popsicle stick to spread until smooth, and gently tap the silicone mold by lifting it about 1 centimeter above the table, releasing it to allow the air bubbles inside to blow, and repeat that for 4 – 5 times, then use the blowtorch to get rid of the air bubbles from above.
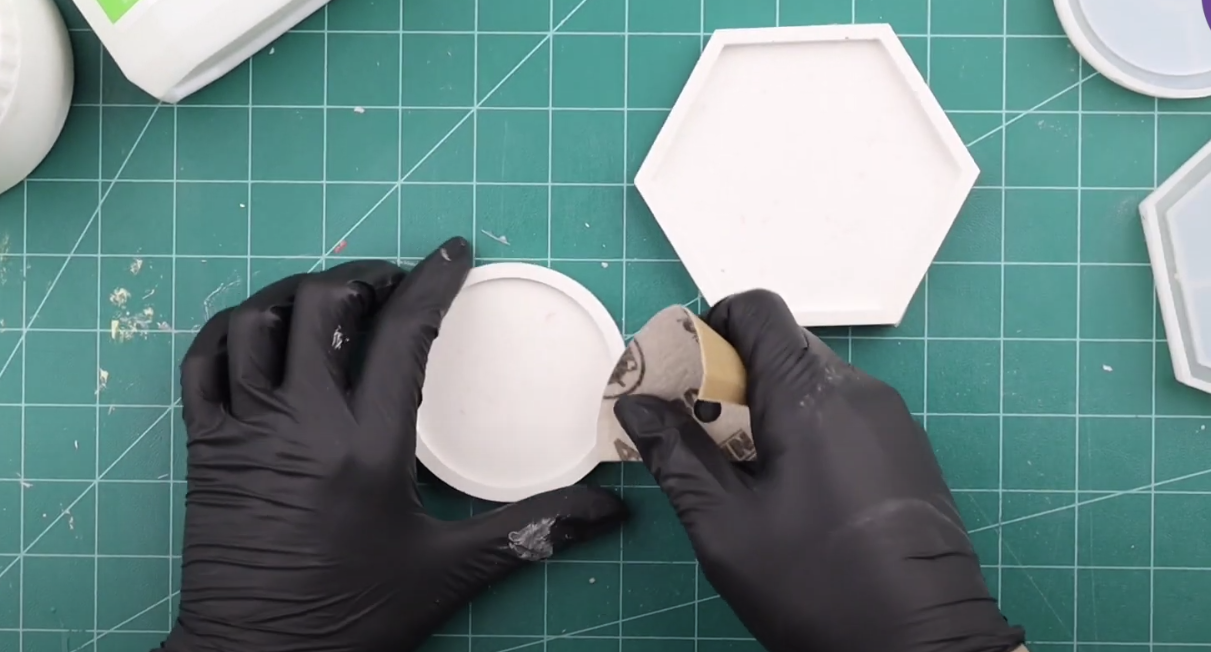
6. Wait for it to dry for about 12 – 24 hours.
Then you can remove it from the silicone mold. After that, use sandpaper grit no. 100, sandpaper no. 120, no. 150, and finish with no. 180.
That’s all. It’s not as difficult as you think, right? Do not forget to try it!